How to setup an XWiki docker container
This page will give detailed information on how to setup a docker container for a XWiki server on a linux machine that you have administrative privileges on. This guide will allow you to accomplish such a setup in a straight-forward way.
But first, the following assumptions must be true:
- You have sudo rights on the machine where you're trying to install the XWiki server on
- This machine already has docker fully installed and properly configured on it. Please perform a test installation of any random image from docker hub to ensure that everything works appropriately
- You already own and are in control of a domain name for which you wish to make the XWiki server accessible through. This domain name is already pre-configured to point to the server that you wish to install XWiki on. In my particular case, I already have pentilescu.com configured to point to my VPS and, what I wished to accomplish was to have a subdomain via which I could access XWiki. In this particular case, this subdomain was wiki.pentilescu.com. To that end, you must have nginx also configured and running on the same server in the background, to have it redirect connections whose destination is a specific port to a subdomain
- Finally, you must have an SMTP email server running somewhere accessible to the docker instance. XWiki will need to use this server to relay account activation emails as well as password reset emails to its users
With all of these details in mind, let's begin!
- Configuring an appropriate docker-compose setup
- First run of the container
- Nginx reverse proxy configuration
- Retrieving files for installing the Standard flavor packages and all its extensions
- Initial XWiki setup for administrative account and installing the Standard flavor
- Post-installation configurations that are a good idea
- External references
Configuring an appropriate docker-compose setup
On the machine you wish to run the docker instance on, please go to a directory where you have write access to and make a directory specifically for the docker files that XWiki and its database will write all of their persistent data to. In my particular case, I went to "/home/alex/Scripts/" and created an empty "xwiki" directory in it. The exact location of this directory is not particularly important but, if you do regular backups of your machine and you wish for all the XWiki data to also be backed up by these processes, keep in mind to create this folder in a location that's being backed up by your preferred solution, as this directory will contain all the database and XWiki pages that you will be creating, including all attachments uploaded by your users.
Afterwards, in this newly created directory, please create the following empty subdirectory: mariadb
This subdirectory will contain the contents of two configuration files that will later be mapped by docker into the XWiki containers. After creating the "mariadb" directory, cd into it and then run the following bash command in it:
wget https://raw.githubusercontent.com/xwiki-contrib/docker-xwiki/master/14/mariadb-tomcat/mariadb/xwiki.cnf
PLEASE NOTE: THE ABOVE LINKS MAY BE OUTDATED. Please click here to find a most likely more up to date version of those links
Finally, once both of those files are downloaded, please proceed to cd back into the parent directory (which is "xwiki" in my case) and then create a docker-compose.yml file with the following contents:
# See the NOTICE file distributed with this work for additional
# information regarding copyright ownership.
#
# This is free software; you can redistribute it and/or modify it
# under the terms of the GNU Lesser General Public License as
# published by the Free Software Foundation; either version 2.1 of
# the License, or (at your option) any later version.
#
# This software is distributed in the hope that it will be useful,
# but WITHOUT ANY WARRANTY; without even the implied warranty of
# MERCHANTABILITY or FITNESS FOR A PARTICULAR PURPOSE. See the GNU
# Lesser General Public License for more details.
#
# You should have received a copy of the GNU Lesser General Public
# License along with this software; if not, write to the Free
# Software Foundation, Inc., 51 Franklin St, Fifth Floor, Boston, MA
# 02110-1301 USA, or see the FSF site: http://www.fsf.org.
# ---------------------------------------------------------------------------
version: '2'
networks:
bridge:
driver: bridge
services:
# The container that runs XWiki + Tomcat
web:
image: "xwiki:lts-mariadb-tomcat"
container_name: xwiki-mariadb-tomcat-web
depends_on:
- db
ports:
- "8081:8080"
# Default values defined in .env file.
# The DB_USER/DB_PASSWORD/DB_DATABASE/DB_HOST variables are used in the hibernate.cfg.xml file.
environment:
- XWIKI_VERSION=${XWIKI_VERSION}
- DB_USER=${DB_USER}
- DB_PASSWORD=${DB_PASSWORD}
- DB_DATABASE=${DB_DATABASE}
- DB_HOST=xwiki-mariadb-db
# Provide a name instead of an auto-generated id for xwiki data (the permanent directory in included in it)
# configured in the Dockerfile, to make it simpler to identify in 'docker volume ls'.
volumes:
- ./data/xwiki-data:/usr/local/xwiki
networks:
internal_xwiki_network:
ipv4_address: 192.168.80.3
# The container that runs the database (mariadb)
db:
image: "mariadb:10.5"
container_name: xwiki-mariadb-db
# - We provide a xwiki.cnf file in order to configure the mysql db to support UTF8 and be case-insensitive
# We have to do it here since we use an existing image and that's how this image allows customizations.
# See https://hub.docker.com/_/mariadb/ for more details.
# - Provide a name instead of an auto-generated id for the mariadb data, to make it simpler to identify in
# 'docker volume ls'
volumes:
- ./mariadb/xwiki.cnf:/etc/mysql/conf.d/xwiki.cnf
- ./data/mariadb-data:/var/lib/mysql
- ./mariadb/init.sql:/docker-entrypoint-initdb.d/init.sql
# Configure the MariaDB database and create a user with provided name/password.
# See https://hub.docker.com/_/mariadb/ for more details.
# Default values defined in .env file.
environment:
- MYSQL_ROOT_PASSWORD=${MYSQL_ROOT_PASSWORD}
- MYSQL_USER=${DB_USER}
- MYSQL_PASSWORD=${DB_PASSWORD}
- MYSQL_DATABASE=${DB_DATABASE}
networks:
internal_xwiki_network:
ipv4_address: 192.168.80.4
networks:
internal_xwiki_network:
driver: bridge
ipam:
driver: default
config:
- subnet: 192.168.80.0/24
There are many different configurations you can use to have an XWiki server. For one, mariadb is NOT required to install XWiki, it's simply one of many database solutions that XWiki is compatible with. Alternatively, you may use MySQL or even PostgreSQL, instead. To see docker-compose configuration options for those, please reference the full official docker reference guide for XWiki at the "External references" section of this page for more details. Keep in mind, though, in case you do decide to use an alternative to mariadb, to download a different init.sql file than the one mentioned in the previous step!
Finally, in the current directory that you are in, please create another subdirectory called "data" containing the empty subdirectories "mariadb-data" and "xwiki-data". The mariadb-data directory will contain all the persistent data from the database and the xwiki-data will contain the persistent data with respect to our XWiki installation, such as XWiki extensions, icons, as well as user-uploaded attachments.
One last note: the subnet 192.168.80.x IP address space configured for our docker network may be changed to whatever suits your particular needs, although, if you do use a different IP space, please keep in mind to also change the reference "mynetworks" configuration for postfix accordingly, as explained in the "Configuring Postfix to send XWiki emails" section of this page.
Now, all we need to do is create a ".env" file in the main directory ("xwiki" is the name of my directory) containing the following contents:
DB_PASSWORD=<database_password>
MYSQL_ROOT_PASSWORD=<mysql_root_password>
DB_DATABASE=xwiki
XWIKI_VERSION=1.0
Please replace <database_password> and <mysql_root_password> with randomly generated long strings, preferrably containing a long sequence of lowercase, uppercase letters, digits and symbols. In my case, I chose 12 character long sequences for each of them. It's unlikely for a hacker to compromise your docker environment but it's still best practice to make the passwords as long and hard to guess as possible, as an extra layer of security.
First run of the container
The first run is always the scariest. Start up the docker image and wait for everything to initialize:
If you followed along just the way I described in this article, you shouldn't have any problems with this step. Note that XWiki takes a significant amount of time to initialize, around 10 minutes.
Take your time and don't rush!
When you want to see the status of your installation, visit the domain name pointing to your server at port 8081. In my case, I would visit http://pentilescu.com:8081/
You might see a page indicating that XWiki is initializing, as well as a percentage counter indicating its progress. Let the server finish doing its thing.
In the end, you should see an image like the one below:
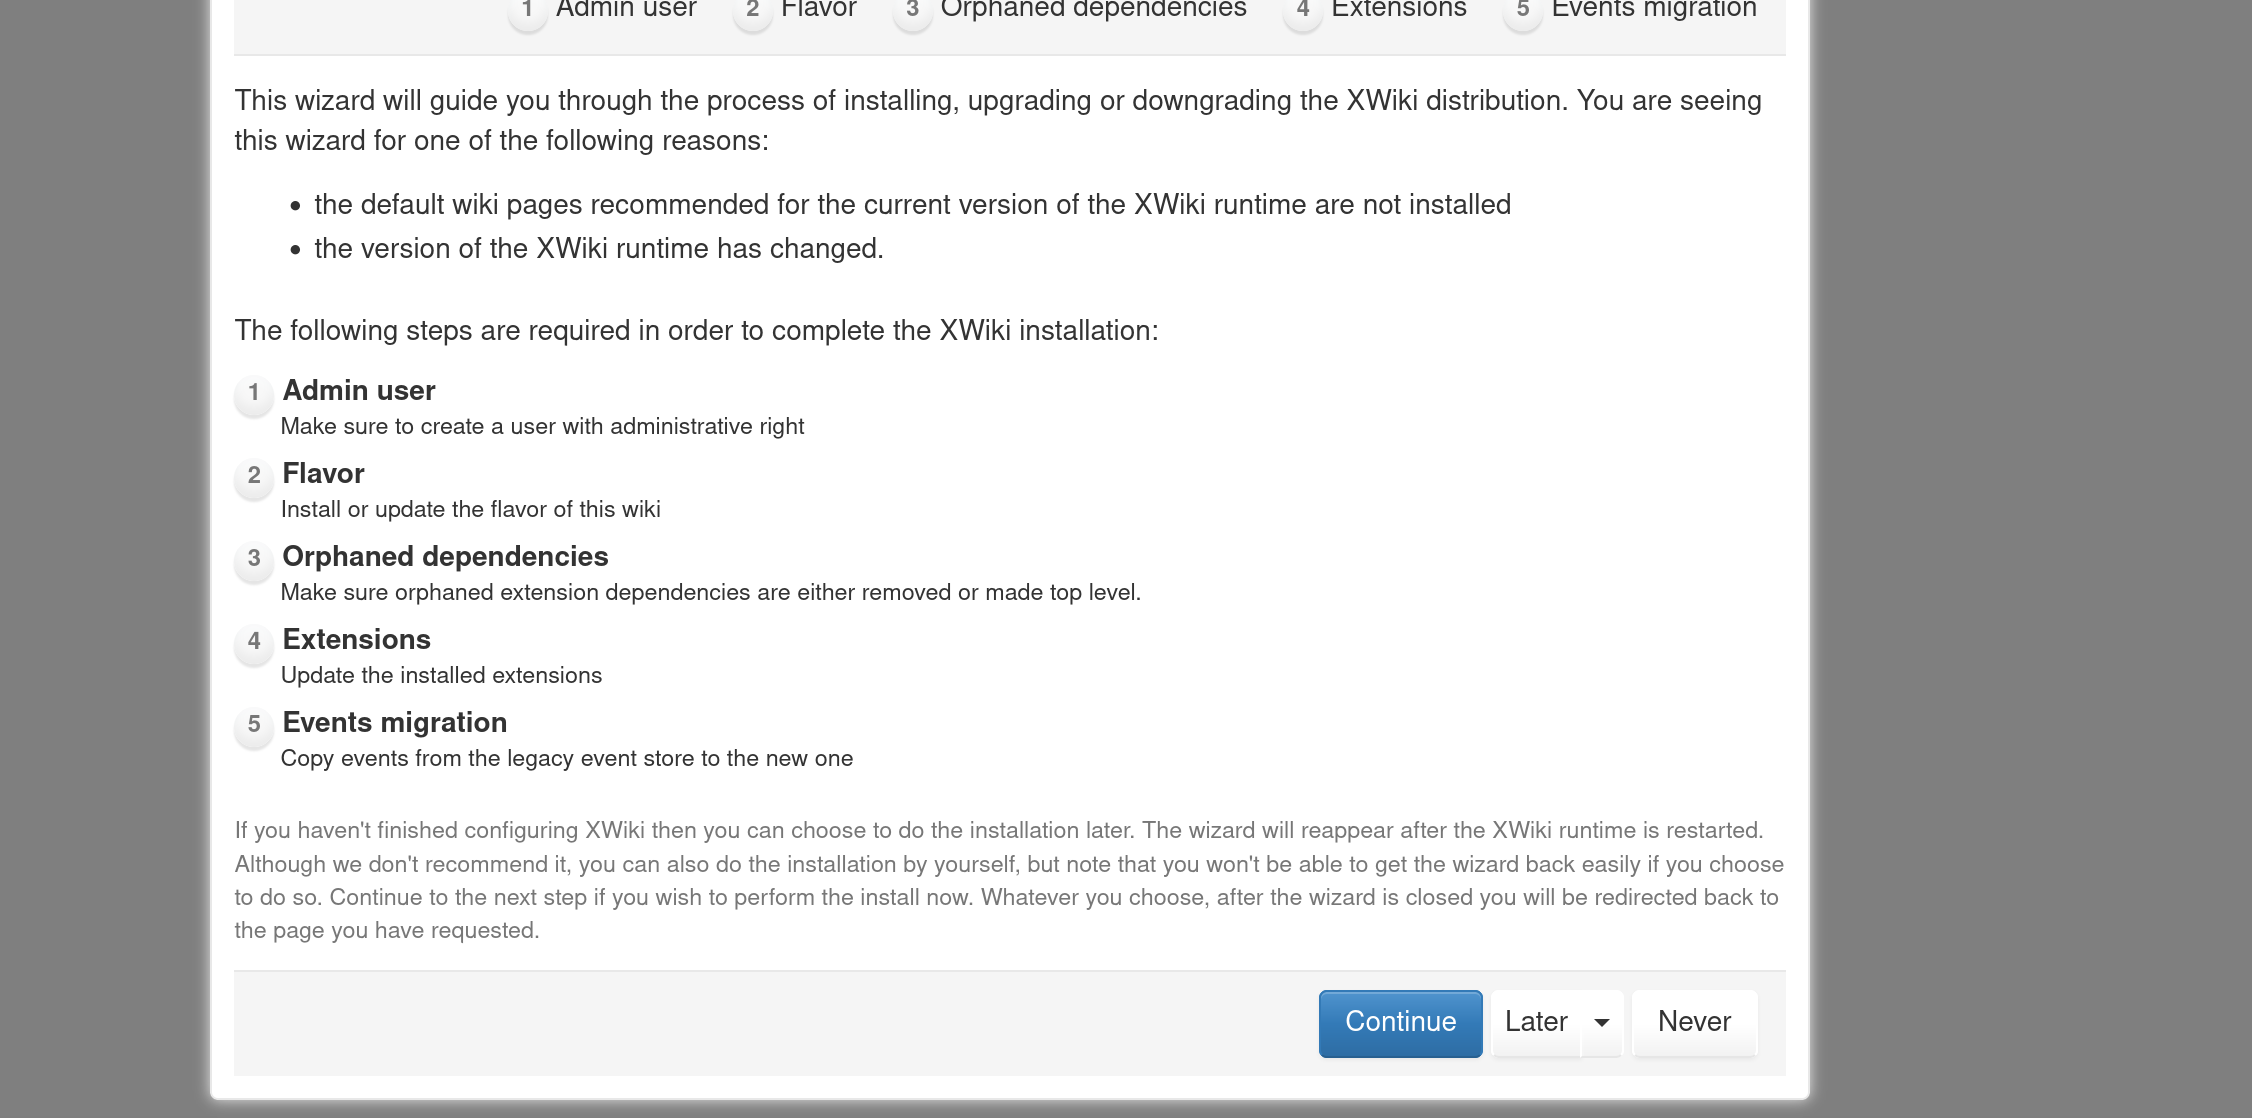
While it may be tempting to immediately try to setup an administrator account from this portal, unless you're browsing this page from localhost (i.e. the XWiki server is on the exact same machine that you're running your web browser from) DO NOT register an account YET! All traffic is unencrypted to the server and may be intercepted by anyone sniffing your internet packets. We must first configure an X.509 TLS certificate with Nginx and configure Nginx to act as a reverse proxy for this wiki
For the time being, press the "Later" button on the dialog (not the "Never" one!) and then run a "docker-compose down" to stop the container from running. The first test run was a success! Congratulations!
Nginx reverse proxy configuration
We assume you already have Nginx installed and properly configured on your machine. Also, we will assume you have an X.509 certificate whose Subject Alt Names includes both your domain name, as well as the subdomain for your wiki (i.e. in my case for pentilescu.com and wiki.pentilescu.com, respectively) and you've configured Nginx to utilize both of them! If this is not the case or you're unsure how to perform these configurations, please check the internal "How to setup an Nginx reverse proxy and also provide a global X.509 certificate for it" guide at the bottom of this page.
In "/etc/nginx/sites-available/", please create a "xwiki.conf" file with the following contents:
server_name wiki.pentilescu.com;
listen [::]:443 ssl http2; # managed by Certbot
listen 443 ssl http2; # managed by Certbot
include /etc/nginx/snippets/ssl.conf;
location / {
proxy_pass http://localhost:8081;
}
}
Please replace "wiki.pentilescu.com" with the domain and subdomains that you desire for your particular website. Also, please adapt "/etc/nginx/snippets/ssl.conf" to reference the X.509 Nginx configuration file on your particular server. If you do not wish to support TLS at all, you may remove this line, as well as the "listen" directives from above.
Effectively, what this configuration file will do is tell Nginx to redirect all HTTP/HTTPS connection verbs directed at wiki.pentilescu.com to localhost port 8081, optionally also injecting the TLS certificates into the connection to secure it as well. By doing this, instead of having to connect to port 8081 on your server manually, future users of your XWiki instance will have to type the subdomain in their browser's address bar instead, which is usually more human readable and more memorable for most people. Typing in "wiki.pentilescu.com" into your browser's address bar is more human friendly than typing "pentilescu.com:8081". Not only are numeric port numbers difficult to remember, but Nginx will also inject TLS into the connection to secure it if you configured the X.509 certificates properly, effectively securing your visitors' connection every time so that their login credentials are protected even against network sniffers.
Once you've done this, create a symbolic link with the following command to activate your new configuration:
Finally, test your configuration before restarting Nginx with:
If errors are reported, please review your configuration files and repair all the detected issues. If everything is fine then issue a "sudo systemctl restart nginx" and then you're pretty much good to go!
Retrieving files for installing the Standard flavor packages and all its extensions
While the docker container contains all the necessary system utilities to run the XWiki server internally, a lot of functionality for the Wiki will be missing as it is.
The XWiki container is very lackluster even in administration features and not installing the Standard flavor will give you a very barebones and almost functionally broken experience. As such, while optional, it is very strongly encouraged to install the Standard flavor along with XWiki to activate many of its most basic features.
To do so, we will have to download a very specific XIP package from XWiki's download portal. Visit here this aforementioned download portal and click the "Download" button for the Long Term Support option on that page. On the new page, click the "Download" button for the "XIP Package" section. This will allow you to download the XIP package in question to your local computer.
Unzip the contents of this XIP package (XIP is just a specific flavor of a ZIP archive so you can just rename the file to use the ".zip" extension if your archive program doesn't recognize it) and upload the unzipped contents to the server where the docker image of XWiki is running, under the "data/xwiki-data/data/extension/repository/" subdirectory of your XWiki directory.
Once this has been done, you may issue a "docker-compose up -d" again to start up the XWiki engine once again. Now that the files have been delivered to their expected disk location and are accessible to the engine, you will be good to go to install them efficiently.
There are other means of installing the Standard flavor as well, as detailed here. Choose whichever alternative you wish!
Once the XWiki engine has initialized its start state properly, you may visit your XWiki instance by going into the browser and accessing the wiki via your Nginx configured subdomain, rather than by port 8081 as we previously did. If you opted to also configure Nginx to inject TLS into the connection, you should now see the green lock in your web browser, next to the address bar, indicating that your connection to your server is encrypted and protected from any network sniffers. You may now proceed to both create an administrative account, as well as install the Standard flavor.
Initial XWiki setup for administrative account and installing the Standard flavor
At this point, you should see the following image in your browser again:
It's finally time to setup the administration account! This account will have full privileges throghout the wiki and will be able to view and edit anything and everything. As such, please use a very strong password to protect it from password stuffing attacks!
If in doubt, always use a password manager like Bitwarden to generate strong, long passwords for you! These are guarenteed to have high entropy and are resistant to dictionary attacks.
Fill in all the details for your account, as detailed in the image below: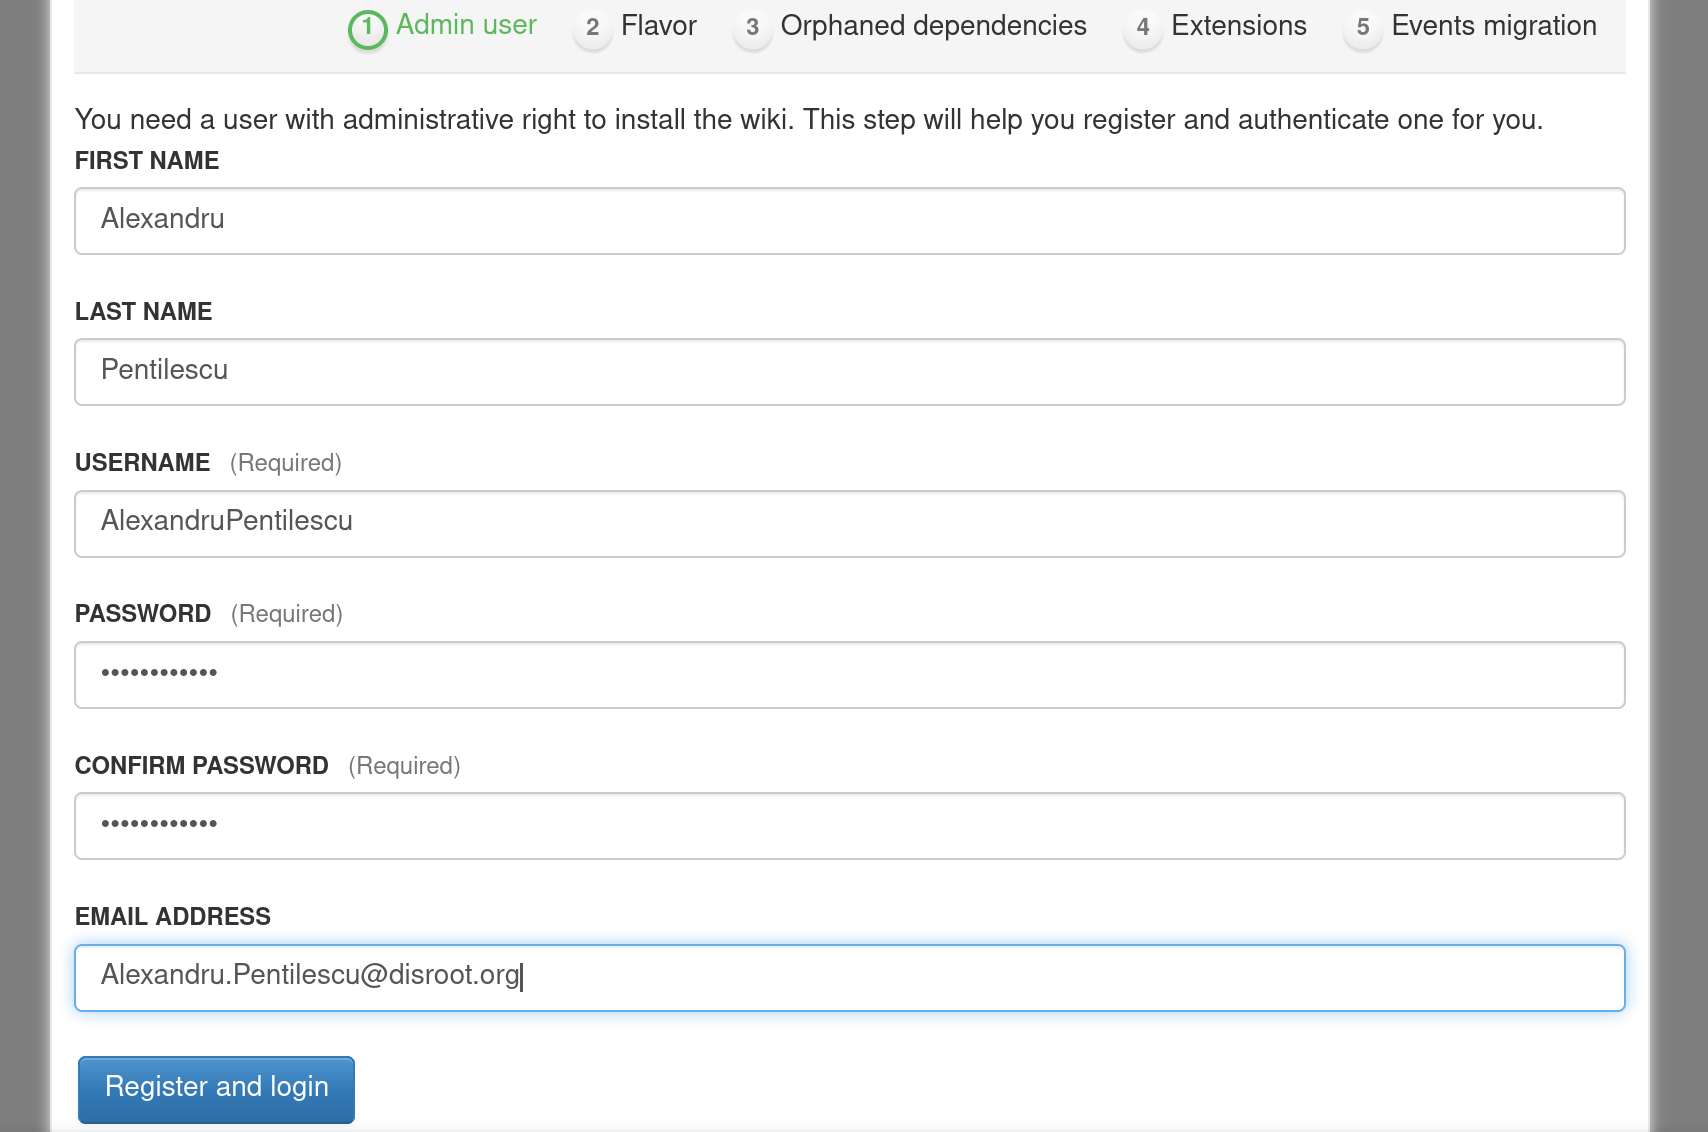
Press the "Register and login" button to immediately login as the newly created user. Once this is done, we can proceed with the Standard flavor installation, as shown below: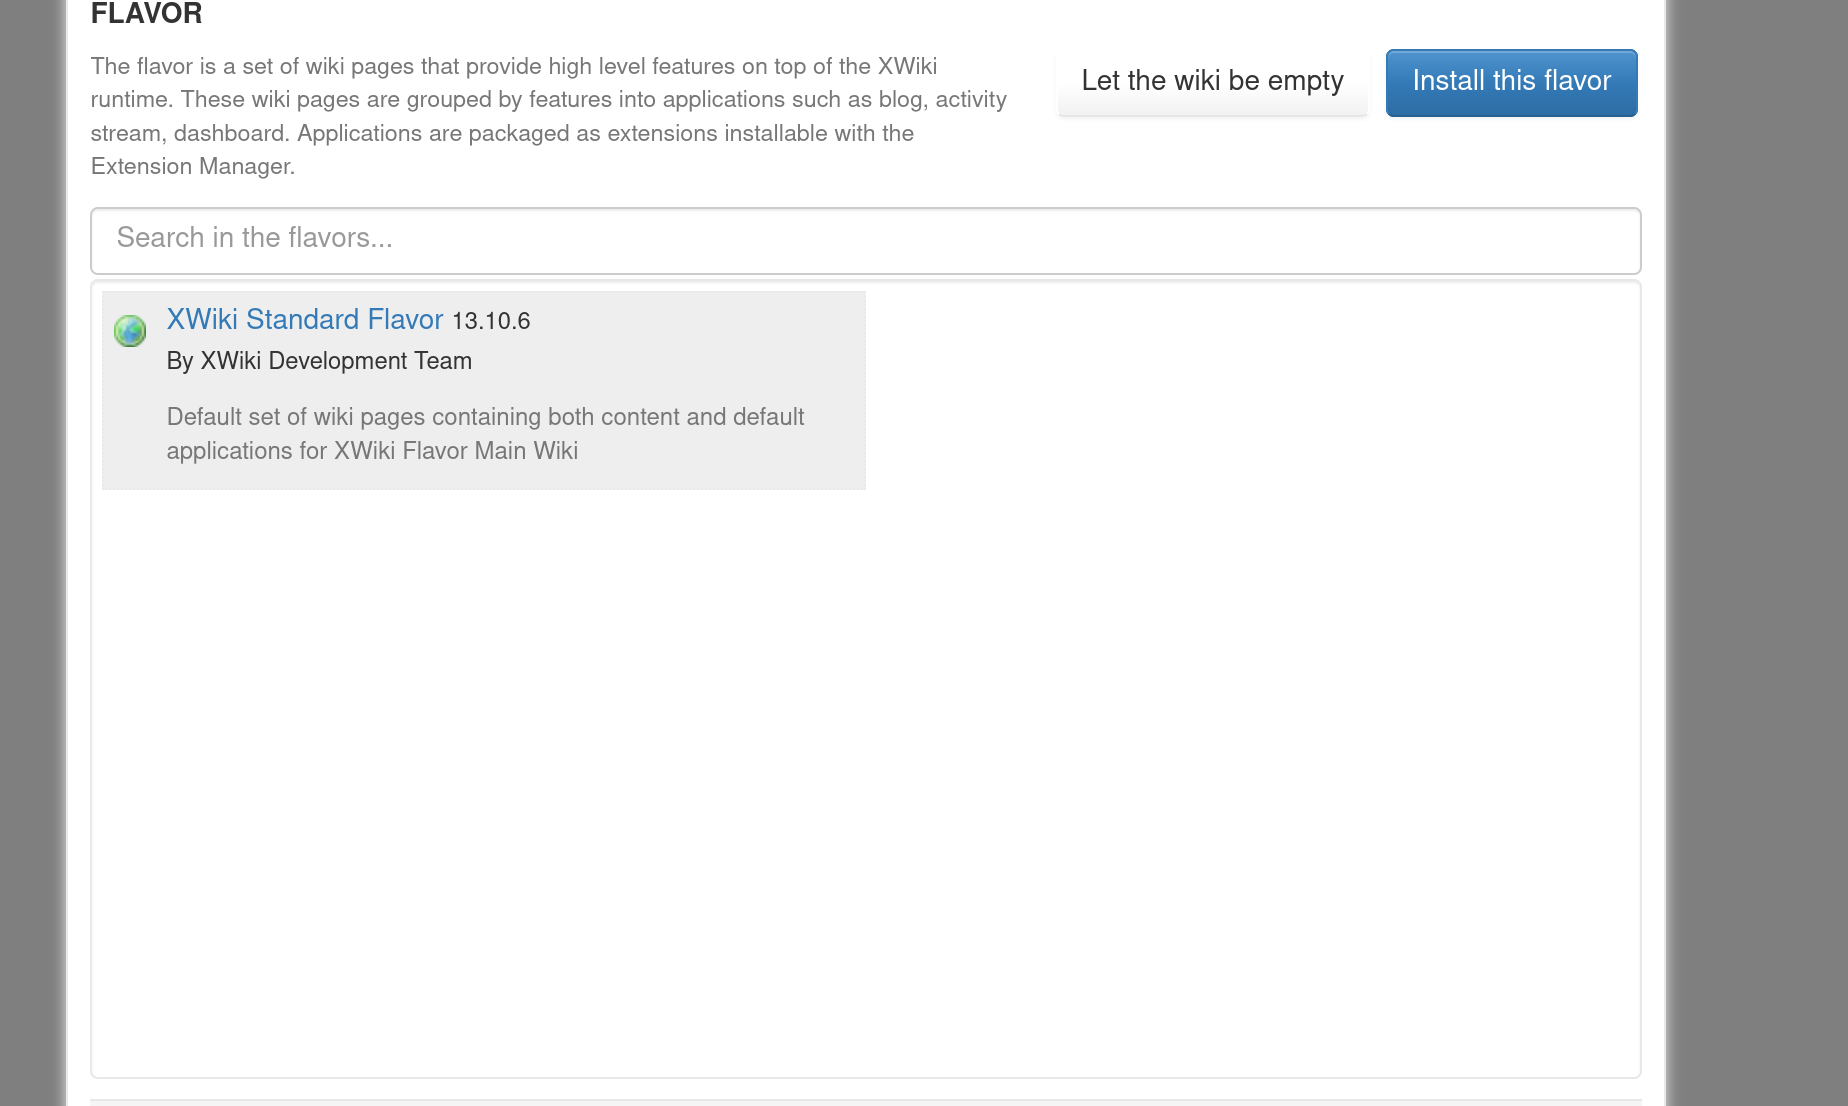
The "XWiki Standard Flavor" option should appear in the FLAVOR window by default if you downloaded the aforementioned XIP package and extracted its contents via the upload I already described in the proper directory. This flavor is ready to be installed now. Press the "Install this flavor" and let's get this show going!
You should come up to the following screen: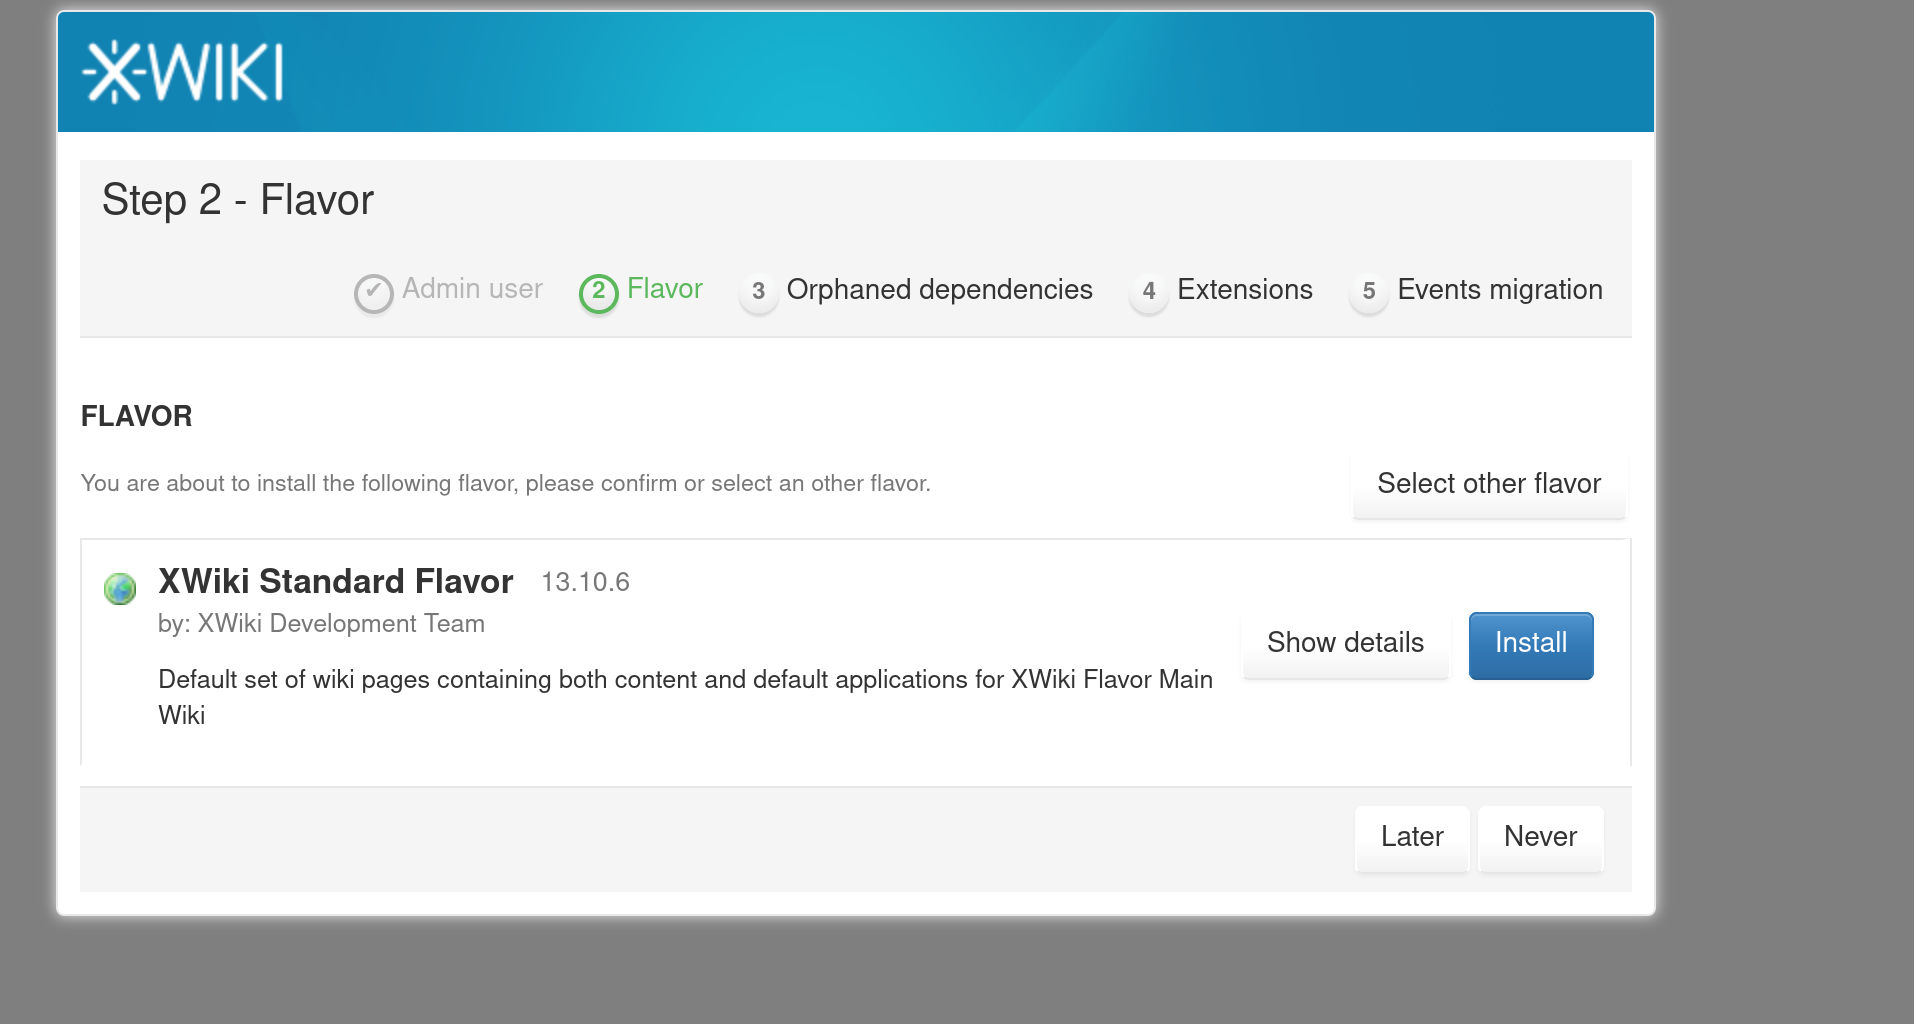
Press "Install".
After some time, the following screen should appear: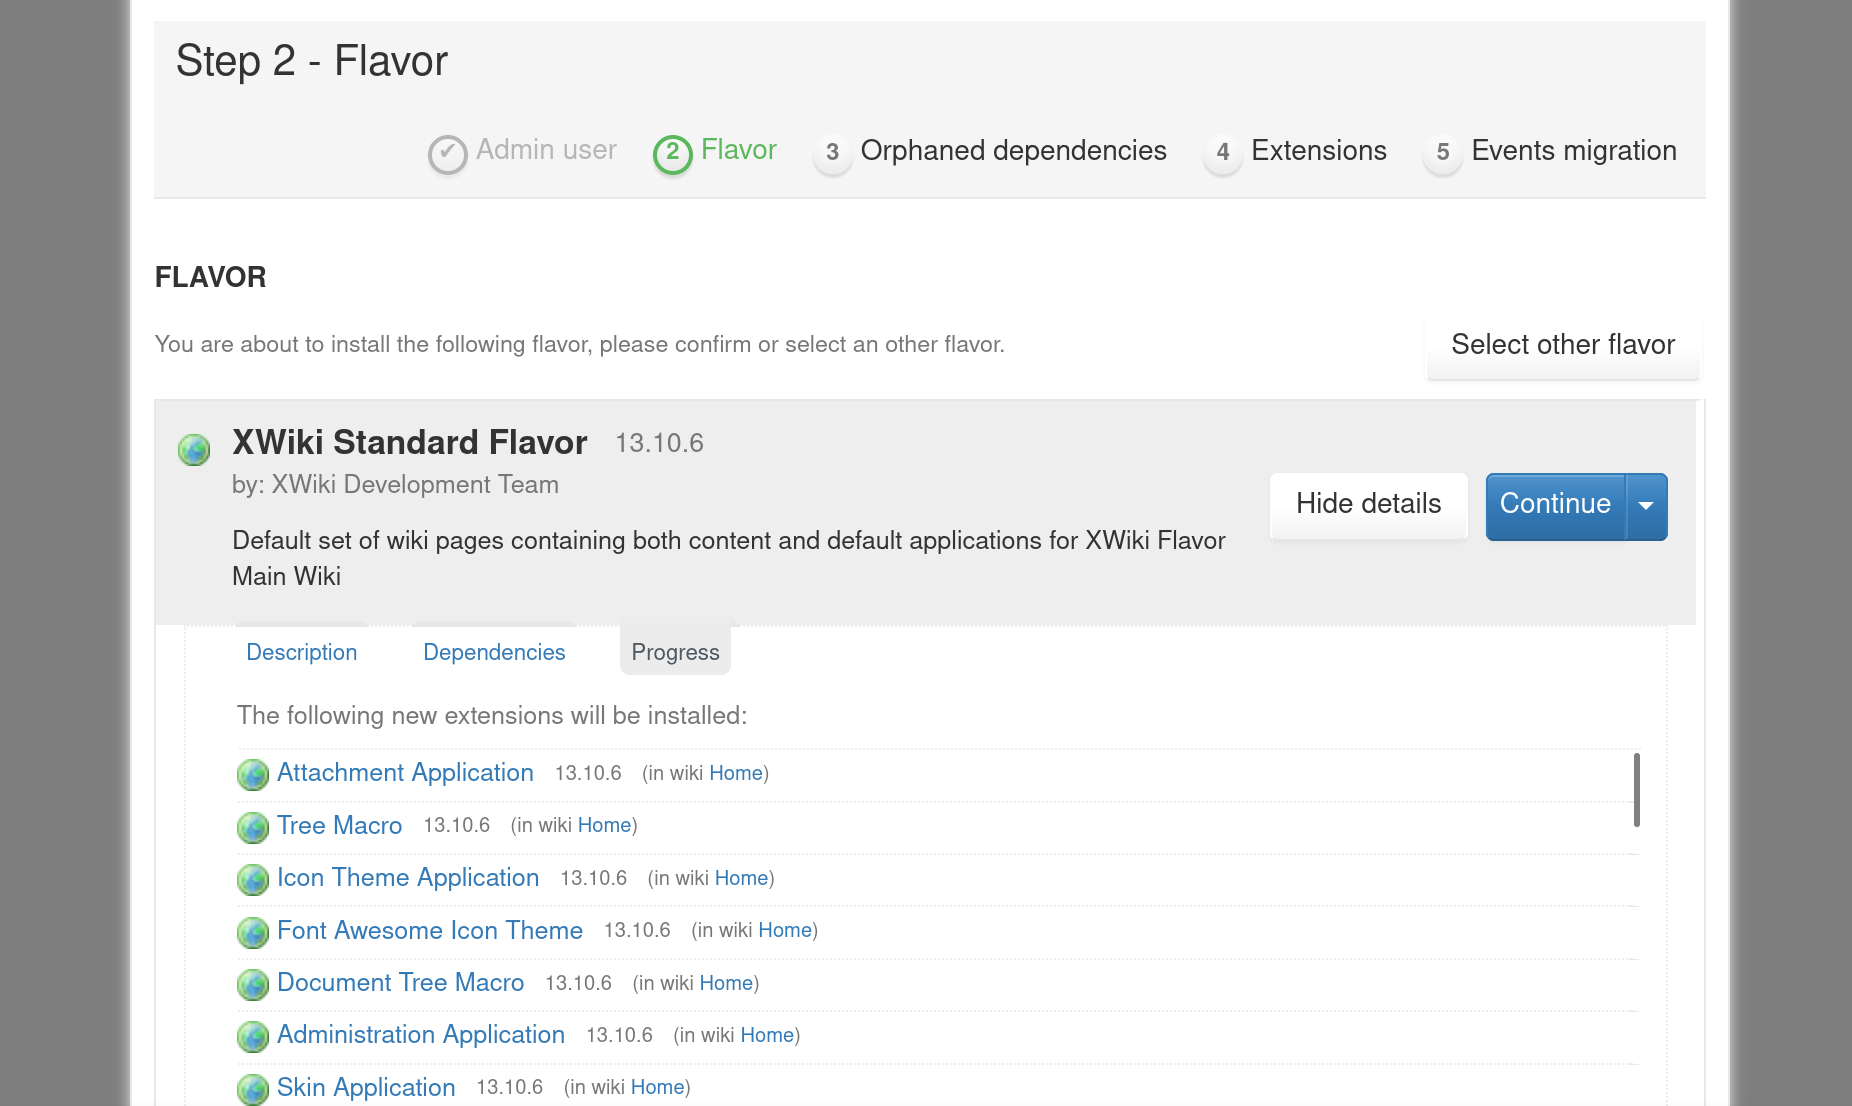
Press "Continue". Admittedly, this took several attempts on my end. I had to press "Continue" multiple times and a Time-out error appeared many times over, indicating that the process failed at some point.
Not sure what was wrong, or what was even timing out. All the packages were supposed to already be provided by the XIP package which I already unarchived, so all the files should have been locally accessible for the server. Was it downloading something else in the process? Don't know.
If you encounter a similar bug, please be persistent and keep on pressing "Continue" for another couple of times, like I did, around 3 or 4 times. If no progress is being made, press the "Later" button instead. If that button is disabled, press the "Select other flavor" at the top first and then press "Later", so that the installation of the Standard flavor is skipped. I did that and eventually it took me to the full Wiki page.
Proceed through the next installation steps and eventually finish the setup wizard entirely.
Once this is done, you should be directed to your XWiki's greeting page!
Congratulations, you've finished your first installation!
Post-installation configurations that are a good idea
You've setup an administrative account, you installed the Standard flavor package and now the Wiki is up and running. You're pretty much done, right?
Well, not quite...
There are still certain configurations which are a good idea that you should do. First and foremost, you should disable account registration, if possible, to ensure that rogue visitors don't get to pollute your database with bogus names. The user registration process is available to all visitors, by default, and this means that literally anyone can register an account on your Wiki. Which may be what you want or it might not be. For me, I prefer creating user accounts manually as the administrator so I opted to turn off the registration option. I suggest you do the same.
Disable guest registration and configure unregistered users' rights
Log into your administrative account if you're not already logged in. Press the hamburger menu button at the top right of the grettings page and open the side menu. From there, select the "Administer Wiki" option.
On the new page, expand the "Users & Rights" left panel and then click on the "Rights" menu option. You should then be redirected to a "Global Administration: Rights" page. Here, you can micro-manage the rights of every single user and groups of users. Explaining user rights and the exact functions of each of these options is outside the scope of this wiki. For now, I'll only describe the disabling of the registration.
There's a horizontal combo box on the new page with the "Groups" and "Users" options, on the top of the page. Click on the "Users" option.
Here, you can micro-manage the rights of individual users. The "Register" checkbox is what we're after. We must deny registration rights to unregistered users.
It may seem that this right is already denied by default for all users, given that the Registration checkboxes will appear empty on your end. This is a quirk of the XWiki access rights UX. Despite these looking like checkboxes, they are not, in fact, traditional checkboxes.
In computer graphics design, one of the most fundamental lessons is that the element of a Checkbox is the graphical equivalent of a mathematical boolean variable (i.e. it must have only one of two states, at any point in time): a checkbox must either be checked or unchecked. The XWiki Rights panel has a different kind of checkbox, though, one that can take 1 of 3 states: empty, allowed and denied. In most cases, the default is the empty state.
Empty means that no particular configuration has been made with respect to that right for that user.
In our case, we wish to deny registration rights for unregistered users, so we have to set the "Registration" checkbox of the "Unregistered Users" row in that table to the "denied" state, like in the screenshot below: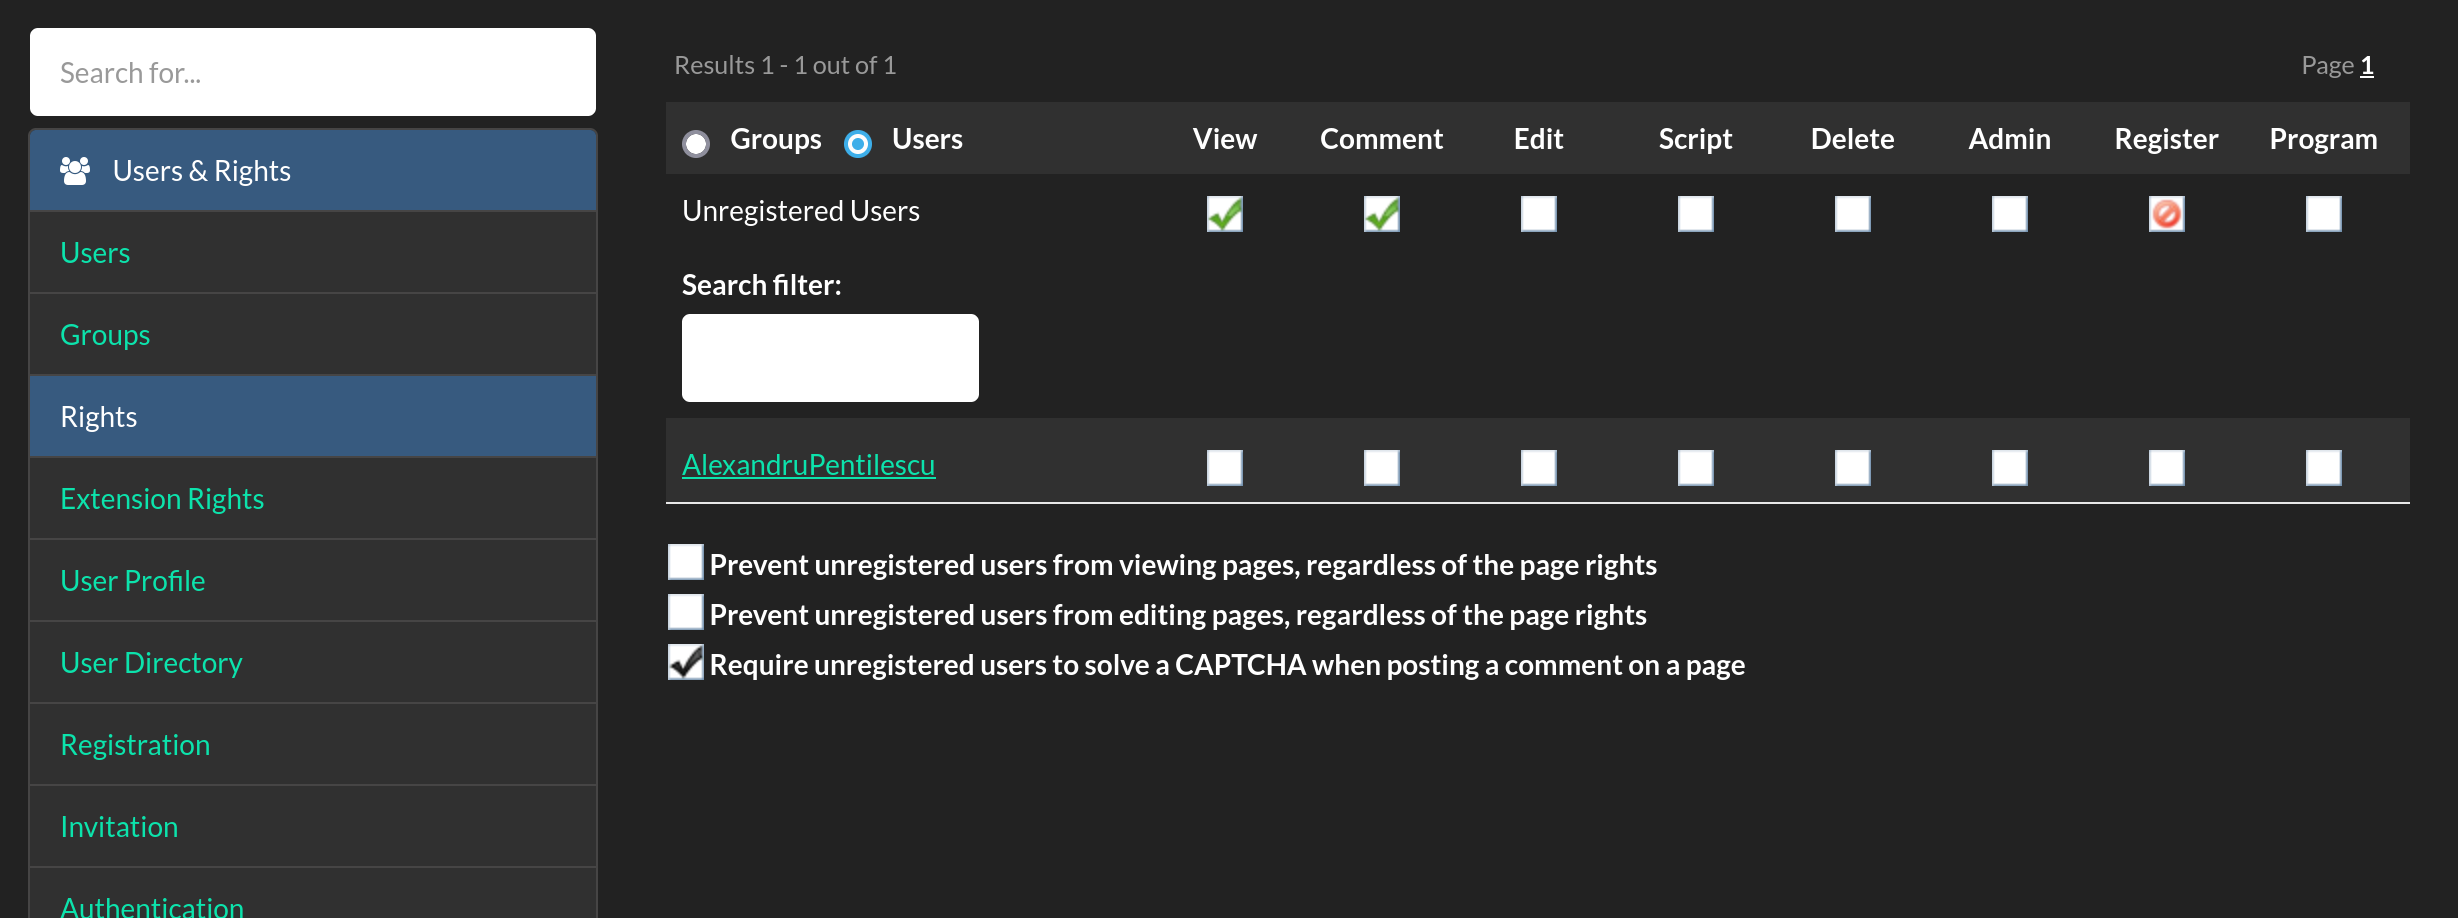
I intentionally left the "View" and "Comment" rights specifically allowed for "Unregistered Users" as I believe that visitors should, intrinsically, have the ability to contribute to content as they see fit, without having to register for an account. You may wish to tweak these user rights as you see fit, though.
If you will allow unregistered users to comment, though, please consider checking the checkbox below for requiring them to solve a CAPTCHA for each comment, like I did. This will prevent technically savvy individuals from writing automated scripts or bots that will access your wiki and continously and automatically keep generating machine-generated text comments. While this will not prevent humans from posting spam on your Wiki, it should prevent bots from doing so.
External references
Official docker guide for installing XWiki
How to setup an Nginx reverse proxy and also provide a global X.509 certificate for it NOT YET WRITTEN!